The following example shows how to create a single text box on a dashboard that filters a list of customers by Region or Product Sub Category. To create this type of filter, you will need to create a parameter, a calculated field, and a filter.
Note: Use this strategy when you want to filter on a single value at a time. For example, looking at only the East or only Tables products.
Create the parameter
The first thing you will need to create is a parameter. The parameter is where users will type in the Region or Product Category values.
Step 1
Connect to your data source. This example uses the Sample - Superstore data source.
Step 2
Right-click an empty area in the Data window and select Create Parameter.
Step 3
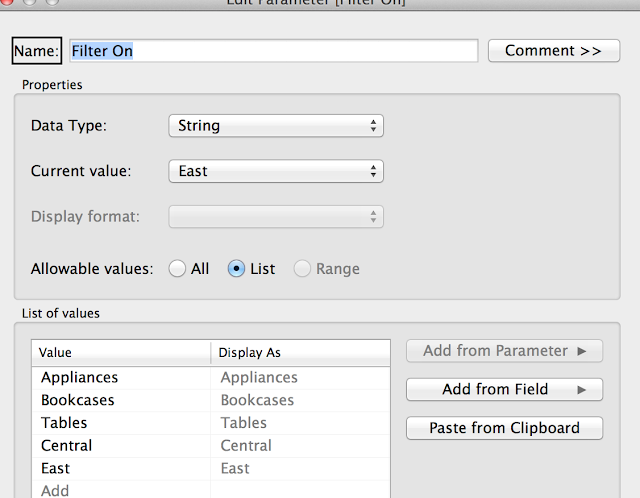
In the Create Parameter dialog box, give the parameter a name such as Filter On. Then specify the parameter settings.
Step 4
Create a calculated field
Now that you have a parameter to collect the value you want to filter on, you need some way of specifying the filter. You can do that by writing a calculated field that compares the Region and Department values to the Filter On value.
Sub Step 1
Select Analysis > Create Calculated Field.
Sub Step 2
In the Calculated Field dialog box, do the following tasks:
- In the Name text box, type Show in View.
- In Formula text box, type the formula below, and then click OK.
if [Region]=[Filter On] and [Product Sub-Category]!=[Filter On] then 'Select'
ELSEIF [Region]!=[Filter On] and [Product Sub-Category]=[Filter On] then 'Select'
else 'Ignore' END
Step 5
Filter the view
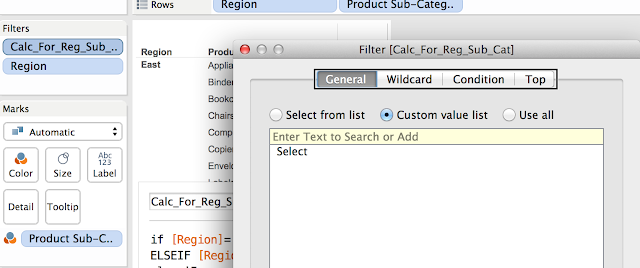
The final step is filtering the view to only include the rows that were marked as "Select." (Note you have to first enter select then click on '+' button)
Step 6
When finished, click OK.Build the view
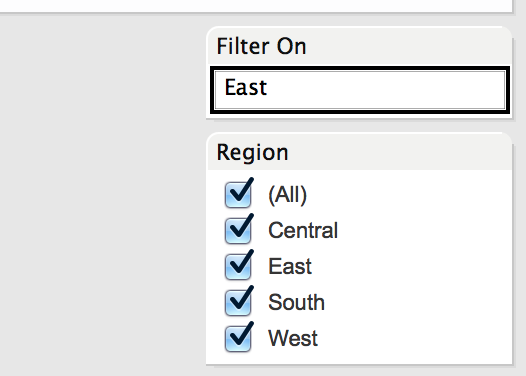
Now that you have all the pieces, build the view you want. Make sure you show the parameter control by right-clicking the parameter in the Data window and selecting Show Parameter Control.


No comments:
Post a Comment